Fundamentals of SSR in React
In 2021 we look set to see the continued rise of the server in thick client applications, and most certainly in the case of React applications specifically. With the announcement of server components, approaches to server side rendering (SSR) set to get even more sophisticated.
Fortunately we also have a growing ecosystem to help us do the heavy lifting. For example, Next.js is an application framework for React that has gained alot of traction within the React community. One of its major selling points is that it provides server side rendering (SSR) out of the box.
the whole goal is to enable Next.js and similar frameworks to be much better.
– Dan Abramov speaking on Server Components
That being said, it’s still a good idea to know how things work at a lower level and to understand the benefits SSR gives us for the added complexity. In this post we will look at what SSR is and it’s advantages. We’ll also incrementally build a Next.js-like SSR experience “from scratch” to get a better idea of how SSR works and to help us understand the constraints and challenges that exist for us when building apps and also for the wider OSS community when looking to provide SSR solutions.
What is SSR
At a high-level SSR just means computing your application HTML on the server before sending it to the browser:

If you’ve been programming websites before technologies like Angular/React hit the scene, you’ll know that server side rendered websites aren’t anything new and SSR was at one point the de facto way things got built using frameworks like ROR, Django, Symfony, Laravel to name a few.

As the Javascript ecosystem evolved and sites became more and more dynamic and interactive, it became possible to shift the responsibility for rendering to the client via technologies like React and Angular. We saw the rise of the thick client app. Single page applications became extremely common.
Single page apps (SPAs) are where the server only sends a minimal (and often static) HTML skeleton to the browser alongside your application Javascript. The browser then loads and executes this Javascript which in turn generates your application HTML and injects it into the page. We call this client-side rendering (CSR). This approach is great because you can eliminate most of the complexity/cost of maintaining a server and just host your app with any static file server (e.g a CDN or S3 bucket).

When we refer to server side rendering in the context of React, the eventual rendering approach will be some combination of SSR and CSR. Applications that can be rendered in multiple environments (server and browser) are referred to as Isomorphic Applications.
Why SSR
You might be wondering why you should care about SSR if you are building React applications. The client is perfectly able to render your app! As with all things programming there are inevitably tradeoffs. As mentioned, eliminating the server from the equation of your application simplifies development/deployment greatly.
However, there are benefits of SSR that you may wish to leverage where the additional complexity is worth it! Let’s look at some of the things SSR can give us.
SEO
In order for your page to appear in search engine results it needs to be indexed. This indexing is performed by bots that crawl your applications pages. Static HTML (the kind returned by SSR) can be indexed rapidly by these bots.
Pages that require Javascript to be loaded and executed before relevant rich HTML is available to be scraped by these bots may get skipped if things don’t load quickly enough, harming SEO in the process.
Improved UX
The first page load for a user will feel snappier when compared to a CSR app. This improved UX is due to SSR yielding a faster first paint (FP), first contentful paint (FCP), and time to interactive (TTI).
- FP: the first time any pixel becomes visible to the user.
- FCP: the time at which requested content becomes visible.
- TTI: the time at which a page becomes interactive.
Content Sharing
You’ll no doubt have noticed that when you share links to different websites on social media, sometimes a nice preview of what you are sharing is generated. This is possible because applications that use SSR return rich HTML that can be easily scraped.
If your content is static and you don’t have a huge number of routes consider prerendering your site content instead.
SSR with React
The
react-dom
library is the official package that contains the low-level primitives which
facilitate SSR with React. With react-dom SSR is achieved in two steps:
- rendering your react code to a string on the server (and sending it to the browser).
- hydrating this content on the client.
Let’s use these building blocks to create an app with rendering that approximates how SSR in Next.js works.
You can find the completed code for what we are building here. If you find a bug/typo please file an issue on this repo! 🙏
Create a new app directory, cd into it and run npm init -y.
Let’s install the basic deps we need to start. We will need React obviously and we’ll install express for our web server:
npm i -S react react-dom expressNow let’s add the dependencies we will need during development.
For now, these consist mostly of @babel modules that will transform our
source code where needed so that it can run in
a Node.js environment.
npm i -D @babel/core @babel/node @babel/preset-env @babel/preset-react nodemonCreate a babel.config.json file in the project root with the following
contents:
{
  "presets": [
    [
      "@babel/preset-env",
      {
        "targets": {
          "node": "current"
        }
      }
    ],
    ["@babel/preset-react"]
  ]
}
Finally create a src directory in the project root
which will house our application code. Now we have our project setup, let’s get building!
Creating The Web Server
Create a file at src/server/index.js. This file
is where we will define our web server and the
logic to handle all incoming requests including the server side
rendering of our react code. We will refer to it as the server entrypoint.
Let’s define a basic web server to get started. Add the following code:
// src/server/index.js
import express from 'express';

const app = express();

app.get("*", (_, res) => {
  res.send("Hello world");
});

const port = process.env.PORT || 3000;
app.listen(3000, function listenHandler() {
  console.info(`Running on ${port}`);
});
Add the following to entries to the "scripts" section of your
package.json:
"scripts": {
    "dev": "babel-node ./src/server/index.js",
    "nodemon": "nodemon --watch ./src -e js,jsx --exec npm run dev"
}
We are using nodemon to restart our server if any files change
within the src directory.
Now let’s try to run the server. Run the following from your terminal:
npm run nodemonYou should see something like the following output:
> ssr@1.0.0 dev /Users/pcaulfie/ssr
> babel-node ./src/server/index.js

Running on 3000
Open a browser tab and navigate to localhost:3000 and verify
you can see “Hello world”. We now have a server side rendered
application. It’s only rendering a simple string though. Let’s
update the code so we render a React application.
Rendering React on the Server
To render our React application on the server we will make use of
the renderToString method of react-dom/server which when passed
a React element will return the corresponding rendered HTML as a
string.
First let’s create our React component code. Create the following files:
src/components/App.jsxsrc/pages/Home.jsx
Your src directory should now look like this:
tree
.
├── components
│   └── App.jsx
├── pages
│   └── Home.jsx
└── server
    └── index.js
Let’s define a simple component in Home.jsx:
// Home.jsx
import React from "react";

const Home = () => {
  console.log("Home Page Render");

  return (
    <button onClick={() => alert('Hello world')}>
      Click Me
    </button>
  )
};

export default Home;
Then create our App component in App.jsx and import
our home page:
// App.jsx
import React from "react";
import Home from "../pages/Home";

export const App = () => (
  <div id="app">
    <Home />
  </div>
);
With our React application code defined all that’s left is to update our server to render our React app and return it:
// server.js
import React from "react";
import express from "express";
import { renderToString } from "react-dom/server";
import { App } from "../components/App";

const app = express();

app.get("*", (req, res) => {
  res.send("Hello world");
  const app = renderToString(<App />);
  res.send(app);
});

const port = process.env.PORT || 3000;
app.listen(port, function listenHandler() {
  console.info(`Running on ${port}`);
});
Save it and once the server has restarted, open a browser tab at localhost:3000.
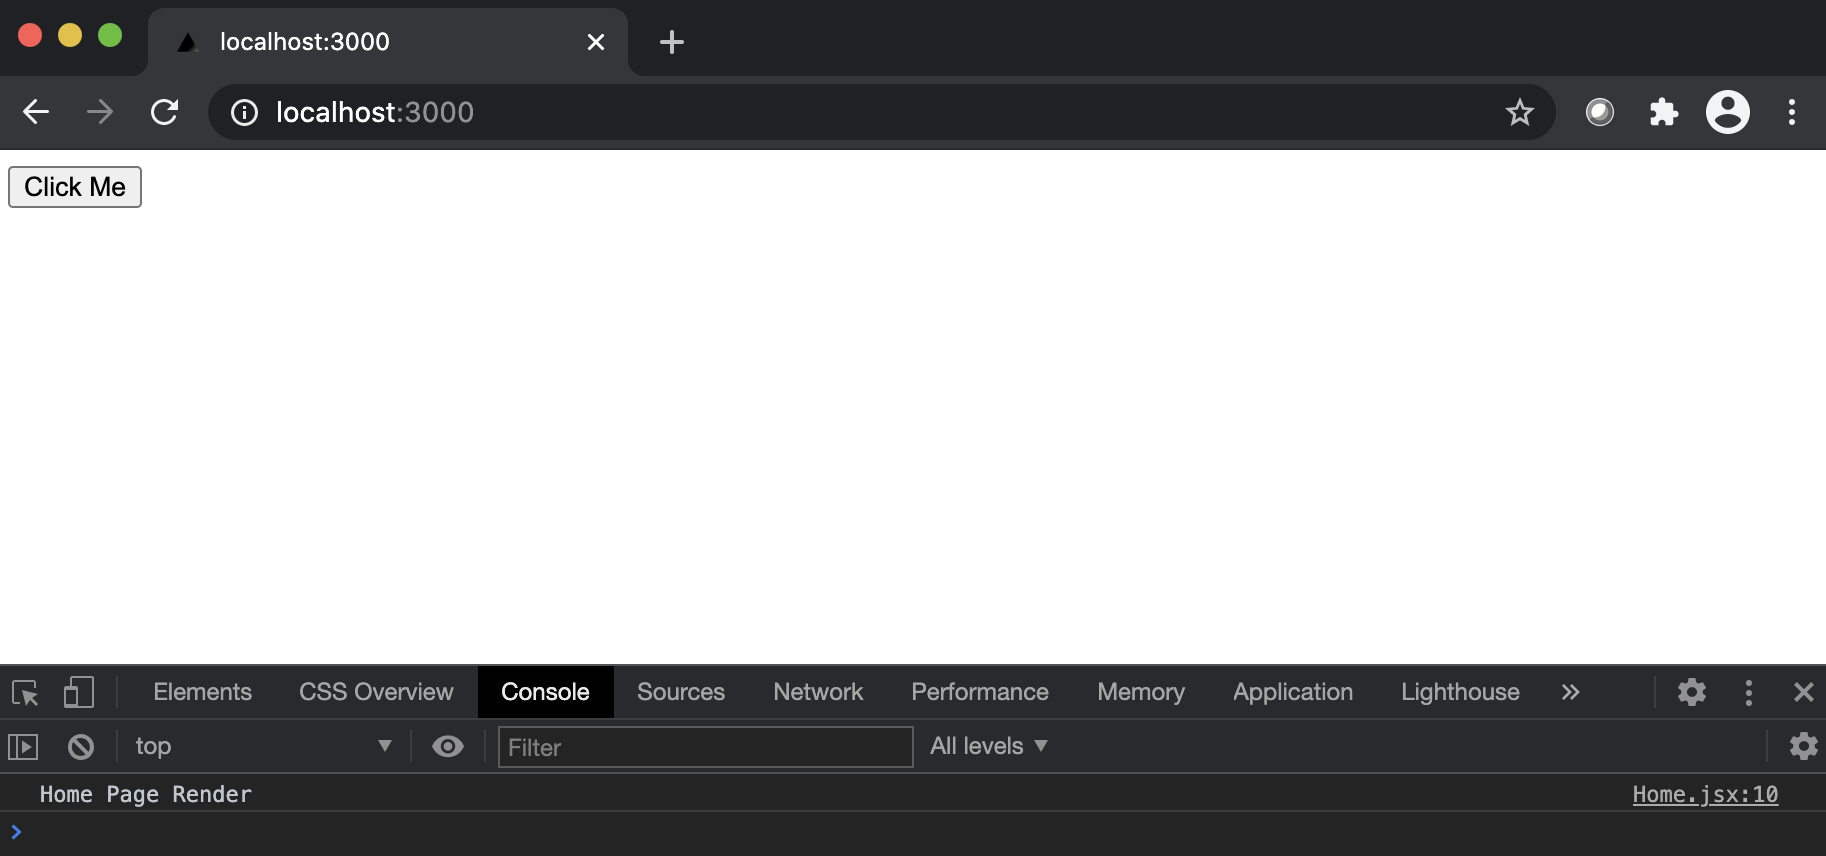
You should now see a button with the text "Click Me". Our server is
now successfully rendering our React application and sending it directly to
the browser!
If you look at your terminal output you should also see a new log message:
babel-node ./src/server/index.js

Running on 3000
Home Page Render
We can see that the body of our Home component was indeed executed on the
server.
You may notice that when you click the button our onClick handler doesn’t
execute. If you open the chrome console in your browser and refresh
localhost:3000 you’ll also notice we don’t see any logs in the console. The
“Home Page Render” log only appears on the server.
This is because renderToString only produces the HTML required for the initial
render without any JS. You can verify this by curling the server response
from your shell:
curl localhost:3000Notice in the returned HTML the onClick attribute has been stripped out:
<div id="app" data-reactroot="">
    <button>Click Me</button>
</div>
In order for us to have interactivity, we need to implement the next key part of SSR with React: Hydration.
Hydrating our SSR App on the Client
Hydration refers to the client side process where the browser takes over the static HTML sent by the server and enhances it with client-side Javascript in order to make things:
- dynamic: via state updates and re-renders in the client.
- interactive: via event listeners.
In React this process is enabled via the hydrate method of the react-dom
package. The hydration process is efficient as React doesn’t need to re-render
the entire application in order to attach the Javascript to make things
interactive. It takes the server generated HTML and works from there.
We’ll need to install some additional dependencies so we can bundle our client side hydration code:
npm i -D webpack webpack-cli clean-webpack-plugin babel-loaderCreating the Hydration Javascript Bundle
Create the following file path: src/client/index.js with the following
contents:
// src/client/index.js
import React from "react";
import { hydrate } from "react-dom";
import { App } from "../components/App";

hydrate(<App />, document.getElementById("react-root"));
and now create a webpack.config.js in our project root containing the config below:
// webpack.config.js
const { CleanWebpackPlugin } = require("clean-webpack-plugin");
const path = require("path");

module.exports = () => ({
  mode: "development",
  entry: {
    app: "./src/client/index",
  },
  output: {
    path: path.resolve(__dirname, "public"),
    publicPath: "",
    filename: "[name].js",
  },
  module: {
    rules: [
      {
        test: /\.(js|jsx)$/,
        include: path.resolve(__dirname, "src"),
        use: {
          loader: "babel-loader",
        },
        exclude: /node_modules/,
      },
    ],
  },
  resolve: {
    extensions: [".js", ".jsx"],
  },
  plugins: [new CleanWebpackPlugin()],
});
We’ll need an npm script so we can run the webpack build. Open the package.json
and update it:
  "scripts": {
    "dev": "babel-node ./src/server/index.js",
    "nodemon": "nodemon --watch ./src -e js,jsx --exec npm run dev"
    "dev": "npm run build && babel-node ./src/server/index.js",
    "nodemon": "nodemon --watch ./src -e js,jsx --exec npm run dev",
    "build": "webpack"
  },
If you run npm run nodemon a new file path should be generated at: public/app.js.
With the updated dev command, any time we change a file in the src directory,
nodemon will restart our dev process which first runs webpack to generate a new
build of our client side Javascript and then starts our web server.
With the code in place to generate our hydration bundle we now need to update our server code to include it in the SSR response.
Adding Server Side Templating
As we are looking to return a more complex HTML response including scripts from our server side render, it’s worth leveraging some server side templating. Templating allows us to define a HTML skeleton which we can inject additional values at run time (like our SSR-ed Application HTML).
We’ll make use of ejs for templating:
npm i -S ejsCreate a file at src/server/views/index.ejs and add the following contents:
<html>
    <body>
        <div id="react-root"><%- app %></div>
    </body>
    <script src="/app.js"></script>
</html>
Now let’s update our server code to make use of our template:
import React from "react";
import express from "express";
import path from "path";
import { renderToString } from "react-dom/server";
import App from "../components/App";

const app = express();
app.set("view engine", "ejs");
app.set("views", path.join(__dirname, "views"));

// tell express to serve all requests for "static" files from the public directory
app.use(express.static("public"));

app.get("*", (req, res) => {
  const app = renderToString(<App />);
  res.send(app);
  res.render('index', { app });
});

const port = process.env.PORT || 3000;
app.listen(port, function listenHandler() {
  console.info(`Running on ${port}`);
});
Save it and once the server restarts navigate to localhost:3000.
You should see the same content as before, but this time if you click the button
an alert should appear. If you open up the Chrome console and refresh you should
also see a new log message "Home Page Render".
This is the result of Hydration! Our app.js bundle is now being loaded by the
browser and hydrating the static HTML that was generated by the server which
leads to another render of our React application, this time in the client.
Adding Routing
Most of the time we’re probably going to want more than a single page in our
application so let’s add some routing. Let’s grab a router. cd in to our app
root and run:
npm i -S react-router react-router-domCreate a second page at src/pages/About.jsx with the contents:
// src/pages/About.jsx
import React from "react";

const About = () => {
  console.log("About Page Render");

  return <h1>Hi From About</h1>;
};

export default About;
Defining the Routes
Create a file at src/routes.jsx and let’s add our routes:
// src/routes.jsx
import React from "react";
import Home from "./pages/Home";
import About from "./pages/About";
import { Route, Switch } from "react-router";

// we'll need this export later
export const routes = [
  {
    path: "/",
    component: Home,
    exact: true,
  },
  {
    path: "/about",
    component: About,
    exact: true,
  },
];

const Routes = () => (
  <Switch>
    {routes.map(({ path, component, exact }) => (
      <Route exact={exact} path={path} key={path} component={component} />
    ))}
  </Switch>
);

export default Routes;
The Switch component from react-router functions conceptually the same way
as a regular Javascript switch construct. The route that has a path which
matches the current url path will have its component value rendered.
Now let’s update our App.jsx to render our routes instead of the Home
component. We’ll also add a basic navigation:
// src/components/App.jsx
import React from "react";
import Home from "../pages/Home";
import { NavLink } from "react-router-dom";
import Routes from "../routes";

export const App = () => (
  <div id="app">
    <Home/>
    <nav>
        <ul>
            <li>
                <NavLink to="/">Home</NavLink>
            </li>
            <li>
                <NavLink to="/about">About</NavLink>
            </li>
        </ul>
    </nav>
    <Routes />
  </div>
);
Adding The Router
Recall that our application will get rendered in two places:
- Server-side via
src/server/index.js. - Client-side via
src/client/index.js.
Routing on the server is different to the client-side routing as it’s stateless.
For this reason the react-router exposes distinct routers:
- Server-side uses:
StaticRouter. - Client-side uses:
BrowserRouter.
Let’s update the server first:
// src/server/index.js
import React from "react";
import express from "express";
import path from "path";
import { renderToString } from "react-dom/server";
import { StaticRouter } from "react-router";
import { App } from "../component";

const app = express();

app.set("view engine", "ejs");
app.set("views", path.join(__dirname, "views"));

app.use(express.static("public"));

app.get("*", (req, res) => {
  const app = renderToString(<App />);
  const app = renderToString(
    <StaticRouter location={req.path}>
      <App />
    </StaticRouter>
  );
  res.render("index", { app });
});

const port = process.env.PORT || 3000;
app.listen(port, function listenHandler() {
  console.info(`Running on ${port}`);
});
And now update the src/client/index.js entrypoint to:
// src/client/index.js
import React from "react";
import { hydrate } from "react-dom";
import { App } from "../components/App";
import { BrowserRouter } from "react-router-dom";

hydrate(<App />, document.getElementById("react-root"));
hydrate(
  <BrowserRouter>
    <App />
  </BrowserRouter>,
  document.getElementById("react-root")
);
Once things have rebuilt and the server has restarted, refresh localhost:3000
and keep an eye on the Server and DevTools console logs. Things should work as before:
- Initial render on the Server.
- Re-render on the client triggered by the hydration step.
You should now see a couple of links above the button. Click the "About" link.
You should see a "About Page Render" log in the console but interestingly
there is no corresponding log in the terminal from the server. It’s entirely
client side rendered.
This is because we’re using client-side routing when we navigate from via our
navigation links thanks to the NavLink component of react-router.
Focus your browser address bar on localhost:3000/about and hit the Enter
key. You should again see a two phase render: server render => client render.
Click the "Home" link and notice we just see a client-side render happening.
This is the beauty of an Isomorphic approach in action.
Initial requests are always rendered on the server facilitating SEO, content sharing, fast first page loads with the client taking over subsequent navigations making that UX feel snappier as we no longer need a full page refresh when navigating to new pages!
There is a problem however. Can you guess what it is?
We have a single bundle for our client-side Javascript: app.js. This means
that when we land on the Home page we are also loading all the Javascript for
the About page. This is not good for performance! We should endeavour to always
limit the page assets we load (Javascript, CSS, images) to what a user needs
in a given context.
In our case we only want to load the page component that corresponds to the current page we are on. We can achieve this via code-splitting.
Route-Based Code Splitting
Code splitting is the splitting of code into various bundles or components which can then be loaded on demand or in parallel.
- MDN
React ships with exports to facilitate
code-splitting. It’s achieved
through a combination of React.lazy and Suspense. Unfortunately SSR (though
planned) is not supported at this point. Enter
loadable-components. It
supports several things React.lazy doesn’t, including SSR!
First things first, we need to install the loadable-components dependencies:
npm i -S @loadable/server@5.14.0 @loadable/component@5.13.2 && npm i -D @loadable/babel-plugin@5.13.2 @loadable/webpack-plugin@5.14.0Now let’s update our code to add code-splitting. First open the
babel.config.json and add the loadable babel plugin:
{
  "presets": [
    [
      "@babel/preset-env",
      {
        "targets": {
          "node": "current"
        }
      }
    ],
    ["@babel/preset-react"]
  ],
  "plugins": ["@loadable/babel-plugin"]
}
Next open the webpack.config.js and add the loadable webpack plugin:
const { CleanWebpackPlugin } = require("clean-webpack-plugin");
const LoadablePlugin = require("@loadable/webpack-plugin");
const path = require("path");

module.exports = () => ({
  mode: "development",
  entry: {
    app: "./src/client/index",
  },
  output: {
    path: path.resolve(__dirname, "public"),
    publicPath: "",
    filename: "[name].js",
  },
  module: {
    rules: [
      {
        test: /\.(js|jsx)$/,
        include: path.resolve(__dirname, "src"),
        use: {
          loader: "babel-loader",
        },
        exclude: /node_modules/,
      },
    ],
  },
  resolve: {
    extensions: [".js", ".jsx"],
  },
  plugins: [new CleanWebpackPlugin()],
  plugins: [new CleanWebpackPlugin(), new LoadablePlugin()],
});
Now we need to update our application entry points. Let’s start with the
simpler update to the client entrypoint. Open src/client/index.js and update it
with the following:
import React from "react";
import { loadableReady } from "@loadable/component";
import { hydrate } from "react-dom";
import { App } from "../components/App";
import { BrowserRouter } from "react-router-dom";

hydrate(
  <BrowserRouter>
    <App />
  </BrowserRouter>,
  document.getElementById("react-root")
);
loadableReady(() => {
  hydrate(
    <BrowserRouter>
      <App />
    </BrowserRouter>,
    document.getElementById("react-root")
  );
});
And now update our server entry point as well to inject our route-based Javascript:
// src/server/index.js
import React from "react";
import express from "express";
import path from "path";
import { renderToString } from "react-dom/server";
import { StaticRouter } from "react-router";
import { App } from "../components/App";
import { ChunkExtractor } from "@loadable/server";

const app = express();
app.set("view engine", "ejs");
app.set("views", path.join(__dirname, "views"));

app.use(express.static("public"));

const statsFile = path.resolve("public/loadable-stats.json");

app.get("*", (req, res) => {
  const app = renderToString(
    <StaticRouter location={req.path}>
      <App />
    </StaticRouter>
  );
  res.render("index", { app });
  const extractor = new ChunkExtractor({
    statsFile,
    entrypoints: ["app"],
  });

  const jsx = extractor.collectChunks(
    <StaticRouter location={req.path}>
      <App />
    </StaticRouter>
  );
  const app = renderToString(jsx);

  const scripts = extractor.getScriptTags();

  res.render("index", { app, scripts });
});

const port = process.env.PORT || 3000;
app.listen(port, function listenHandler() {
  console.info(`Running on ${port}`);
});
Now update our view template to handle our new dynamic scripts value that corresponds to the client-side JavaScript needed for current route:
<html>
    <body>
        <div id="react-root"><%- app %></div>
    </body>
    <script src="/app.js"></script>
    <%- scripts %>
</html>
Finally replace the contents of routes.jsx file with the code below so that webpack
can perform the code splitting:
// source/routes.jsx
import React from "react";
import loadable from "@loadable/component";
import Home from "./pages/Home";
import About from "./pages/About";
import { Route, Switch } from "react-router";
const Home = loadable(() => import("./pages/Home"), {
fallback: <div>loading...</div>,
});
const About = loadable(() => import("./pages/About"), {
fallback: <div>loading...</div>,
});
// we'll need this export later
export const routes = [
{
path: "/",
component: Home,
exact: true,
},
{
path: "/about",
component: About,
exact: true,
},
];
const Routes = () => (
<Switch>
{routes.map(({ path, component, exact }) => (
<Route exact={exact} path={path} key={path} component={component} />
))}
</Switch>
);
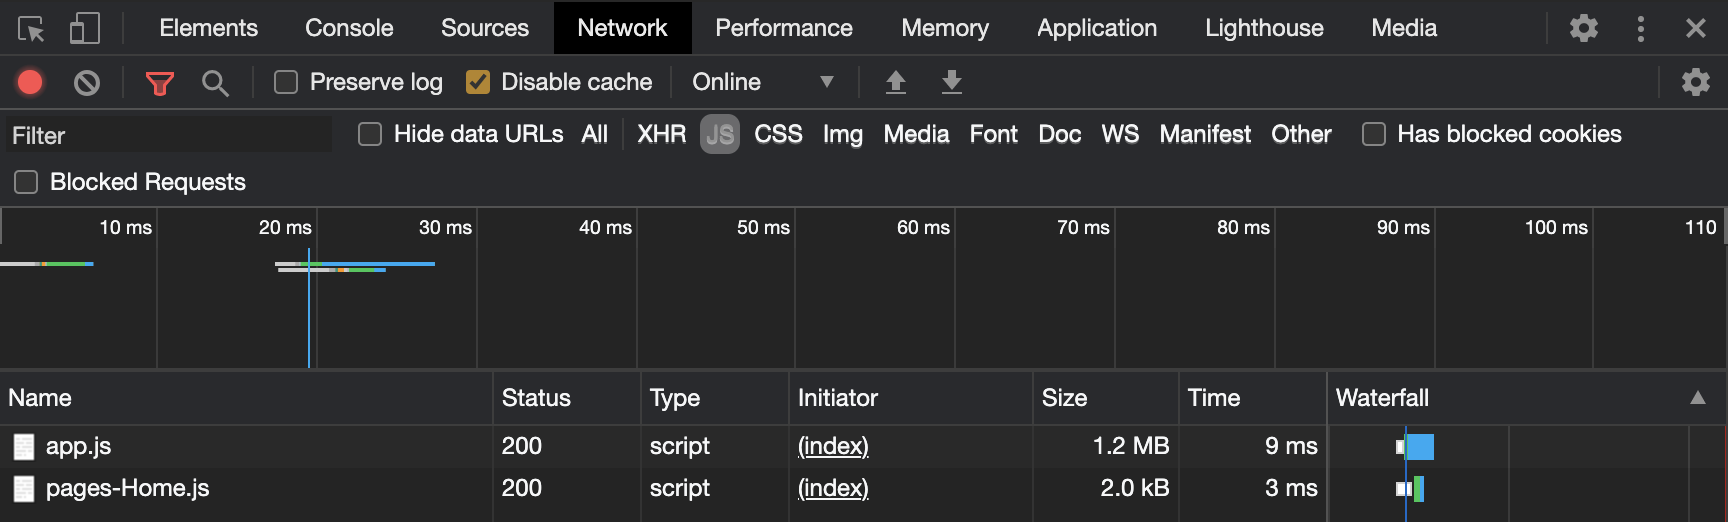
export default Routes;Okay that should be everything needed for our code-splitting to work! Let’s test
it out. Once the server restarts, open Chrome DevTools on the network tab and
select the JS filter. Refresh the page and you should now see two bundles being
loaded for our page:
app.jscontaining the JS that is shared across pages. This will include our site navigation and vendor files likereact,react-dometc.pages-Home.jscontaining the JS for our page component.
Click the “about” link and keep an eye on the network tab. You should see that the navigation triggers a request for the About pages component Javascript:
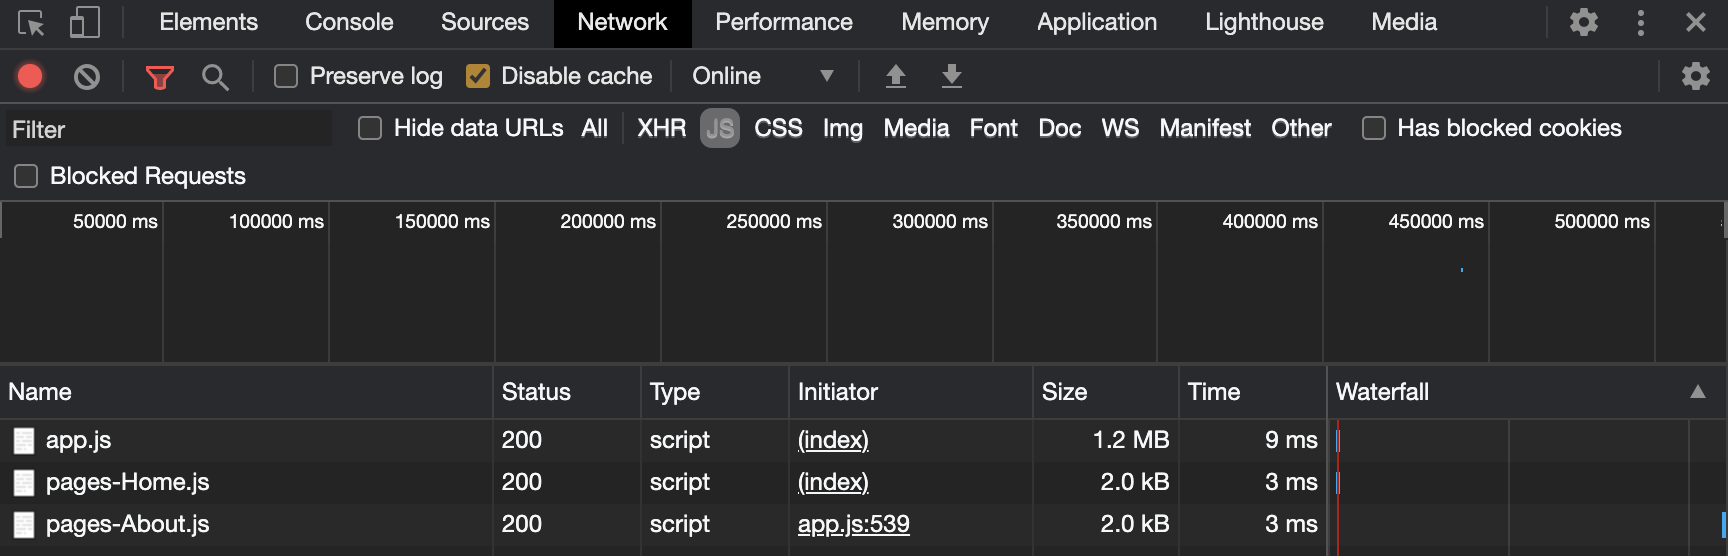
We have now successfully implemented an Isomorphic application with route-based code splitting! 🙌
In order to have a truly dynamic website though, there’s one last thing we need to take care of: Components with data dependencies
Data Fetching
Imagine a /posts route that displays a preview of the most recent
blog posts. In order for SSR to work, that state would need to be part
of the render.
With SSR in React this can prove tricky due to the single pass, synchronous
rendering on the server available to us via renderToString. We have to resolve
our data dependencies before we render.
There are a couple of ways this is typically handled:
- Walk the UI tree and resolve component data dependencies as you encounter them.
- Lift the data dependency up and associate it with a route/page.
Walking the UI tree
This is the more complicated approach. If you are working with GraphQL you can get this with Apollo. Otherwise react-ssr-prepass has got you covered.
In the long term React may eventually ship with this functionality baked in via Suspense.
Associating Data with a Page
This is the approach taken by Next.js. Inside your page component module you
define a getServerSideProps export which Next.js will invoke on the server to
resolve your page data when rendering your page component passing the data as the
initial state.
The tradeoff here is that this approach only works at the top level of your UI tree. Nested components won’t have their own data dependencies resolved.
To keep things simple this is the approach we will use.
react-router provides a matchPath
function that allows us to use the same matching code used by the <Route/>
component outside of normal render cycle to facilitate resolving data
dependencies on the server before rendering.
Let’s update our About page so that it has a data dependency and then we can
make use of matchPath to resolve it on the server before rendering.
Page Data Context
First let’s create a context to hold our page data. This will allow us to inject the page state on the server and allow our page components to access it.
Create the following file src/component/PageContext.jsx with the contents
below:
// src/component/PageContext.jsx
import React, { useContext, useState } from "react";

const PageContext = React.createContext();

export const PageProvider = ({ children, initialState }) => {
  const [data, setData] = useState(initialState);
  const ctx = { data, setData };
  return <PageContext.Provider value={ctx}>{children}</PageContext.Provider>;
};

export const usePageContext = () => useContext(PageContext);
Creating The Data Fetcher
First install cross-fetch, a fetch implementation that works in both
Node.js and browser environments:
$ npm i -S cross-fetchCross fetch is an example of Universal Javascript.
Now we’ll update our About page to consume our PageContext as well adding an
export that will perform our data fetching:
// src/page/About.jsx
import React from "react";
import fetch from "cross-fetch";
import { usePageContent } from "../components/PageContext";

const About = () => {
  console.log("About Page Render");

  return <h1>Hi From About</h1>;
  const { data } = usePageContext();

  return (
    <>
      <h1>Hi From Random Cat</h1>
      {data ? <img src={`https://cataas.com${data.url}`} /> : "loading..."}
    </>
  );
};

export const getAboutData = async () => {
  const res = await fetch("https://cataas.com/cat?json=true");
  return res.json();
};

export default About;
Resolving Data Dependencies on the Server
Let’s update our routes definition so we can resolve data dependencies on the server:
// src/routes.jsx
import React from "react";
import loadable from "@loadable/component";
import { Route, Switch } from "react-router";
import { getAboutData } from "./pages/About";

const Home = loadable(() => import("./pages/Home"), {
  fallback: <div>loading...</div>,
});
const About = loadable(() => import("./pages/About"), {
  fallback: <div>loading...</div>,
});

export const routes = [
  {
    path: "/",
    component: Home,
    exact: true,
  },
  {
    path: "/about",
    component: About,
    exact: true,
    getPageData: getAboutData,
  },
];

export const Routes = () => (
  <Switch>
    {routes.map(({ path, component, exact }) => (
      <Route exact={exact} path={path} key={path} component={component} />
    ))}
  </Switch>
);
And now we will update our server entry point with the following steps:
- Programmatically match the request to a route via
matchPath. - Fetch any data dependencies defined for that route.
- Pass the data in to our
Appin our render step.
// src/server/index.js
import React from "react";
import express from "express";
import path from "path";
import { renderToString } from "react-dom/server";
import { StaticRouter } from "react-router";
import { App } from "../components";
import { ChunkExtractor } from "@loadable/server";
import { routes } from "../routes";
import { matchPath } from "react-router";

const app = express();
app.set("view engine", "ejs");
app.set("views", path.join(__dirname, "views"));

app.use(express.static("public"));

const statsFile = path.resolve("public/loadable-stats.json");

const getPageData = async (path) => {
  const match = routes.find((route) => {
    return matchPath(path, route);
  });

  if (match && match.getPageData) {
    const initialState = await match.getPageData();
    return initialState;
  }
  return null;
};

app.get("*", (req, res) => {
app.get("*", async (req, res) => {
  const extractor = new ChunkExtractor({
    statsFile,
    entrypoints: ["app"],
  });

  const initialState = await getPageData(req.path);

  const jsx = extractor.collectChunks(
    <StaticRouter location={req.path}>
      <App/>
      <App initialState={initialState} />
    </StaticRouter>
  );

  const app = renderToString(jsx);

  const scripts = extractor.getScriptTags();

  res.render("index", { app, initialState, scripts });
});

const port = process.env.PORT || 3000;
app.listen(port, function listenHandler() {
  console.info(`Running on ${port}`);
});
In your terminal execute the following command:
curl localhost:3000/aboutYou should see something like this:
<html>
  <body>
    <div id="react-root">
      <nav>
        <ul>
          <li><a aria-current="page" class="active" href="/">Home</a></li>
          <li><a aria-current="page" class="active" href="/about">About</a></li>
        </ul>
      </nav>
      <h1>Hi From Random Cat</h1>
      <img src="https://cataas.com/cat/5f74734bf4312b0011294e7e"/>
    </div>
  </body>
  <script>
    window.__INITIAL_STATE__ = {"id":"5f74734bf4312b0011294e7e","created_at":"2020-09-30T12:00:11.042Z","tags":[],"url":"/cat/5f74734bf4312b0011294e7e"};
  </script>
  <script id="__LOADABLE_REQUIRED_CHUNKS__" type="application/json">[]</script><script id="__LOADABLE_REQUIRED_CHUNKS___ext" type="application/json">{"namedChunks":["pages-About"]}</script>
  <script async data-chunk="app" src="/app.js"></script>
</html>
Notice the highlighted line in the response. The server is returning our HTML with data now.
If we visit localhost:3000/about in the browser however, we get the loading
state. Recall that the client will hydrate the HTML it gets from the server
via our client entry point and currently that entry point doesn’t know anything
about the data used in the SSR step. Let’s fix that.
Sharing State between Server and Client
Sharing data between the server and the client is actually easier than you might think. We can leverage our server side view template to inject the server resolved data as a global Javascript variable that can later be accessed in our hydrate step.
Open our view template at src/server/views/index.ejs and update to:
<html>
    <body>
        <div id="react-root"><%- app %></div>
    </body>
    <script>
          window.__INITIAL_STATE__ = <%- JSON.stringify(initialState) %>;
    </script>
    <%- scripts %>
</html>
Now let’s inject the data in to the template in our server entrypoint:
// src/server/index.js
import React from "react";
import express from "express";
import path from "path";
import { renderToString } from "react-dom/server";
import { StaticRouter } from "react-router";
import { App } from "../components";
import { ChunkExtractor } from "@loadable/server";
import { routes } from "../routes";
import { matchPath } from "react-router";

const app = express();
app.set("view engine", "ejs");
app.set("views", path.join(__dirname, "views"));

app.use(express.static("public"));

const statsFile = path.resolve("public/loadable-stats.json");

const getPageData = async (path) => {
  const match = routes.find((route) => {
    return matchPath(path, route);
  });

  if (match && match.getPageData) {
    return match.getPageData();
  }
  return null;
};

app.get("*", async (req, res) => {
  const extractor = new ChunkExtractor({
    statsFile,
    entrypoints: ["app"],
  });

  const initialState = await getPageData(req.path);

  const jsx = extractor.collectChunks(
    <StaticRouter location={req.path}>
      <App initialState={initialState} />
    </StaticRouter>
  );

  const app = renderToString(jsx);

  const scripts = extractor.getScriptTags();

  res.render("index", { app, scripts });
  res.render("index", { app, initialState, scripts });
});

const port = process.env.PORT || 3000;
app.listen(port, function listenHandler() {
  console.info(`Running on ${port}`);
});
Next let’s make use of the new global in the client entry point:
// src/client/index.js
import React from "react";
import { loadableReady } from "@loadable/component";
import { hydrate } from "react-dom";
import { App } from "../component";
import { BrowserRouter } from "react-router-dom";

const initialState = window.__INITIAL_STATE__;

loadableReady(() => {
  hydrate(
    <BrowserRouter>
      <App initialState={initialState} />
    </BrowserRouter>,
    document.getElementById("react-root")
  );
});
Finally let’s wrap our app in the PageContent using the initial state as its
value:
// App.jsx
import React from "react";
import { NavLink } from "react-router-dom";
import Routes from "../routes";
import { PageProvider } from "../components/PageContext";
export const App = () => (
export const App = ({ initialState }) => (
<PageProvider initialState={initialState}>
<div id="app">
<nav>
<ul>
<li>
<NavLink to="/">Home</NavLink>
</li>
<li>
<NavLink to="/about">About</NavLink>
</li>
</ul>
</nav>
<Routes />
</div>
</PageProvider>
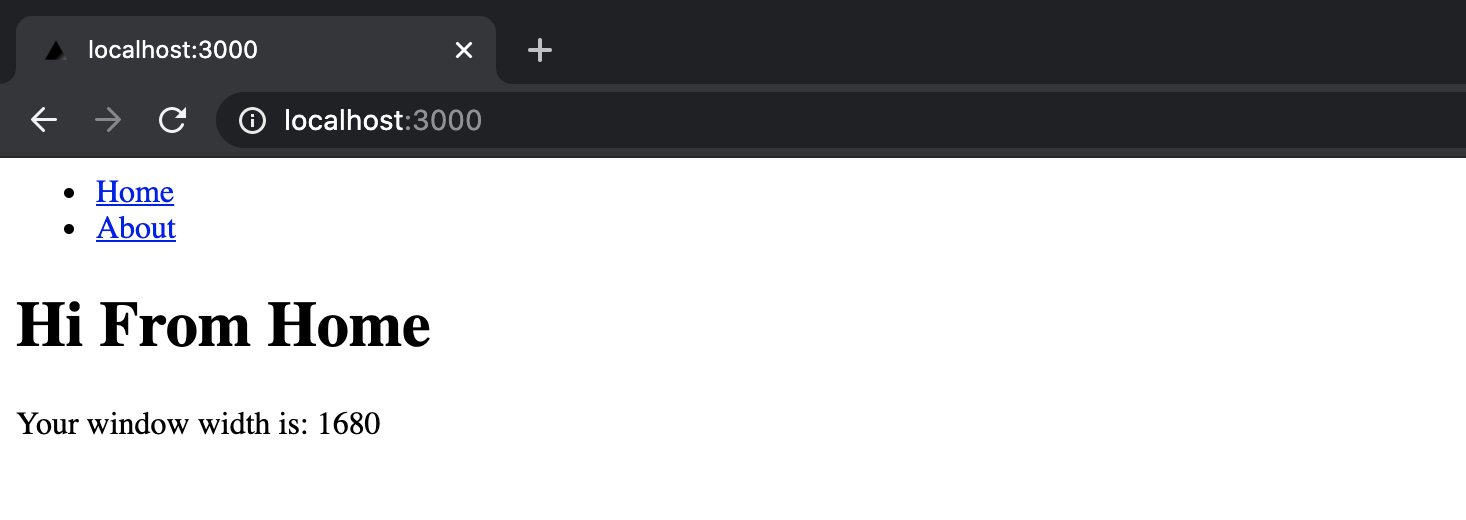
);Once the server restarts, open your browser to localhost:3000/about. You
should see something like this:

The data is now being shared successfully between the server and the client 🎉
Adding Client Data Fetching
There’s one last data fetching case we need to account for. If we navigate to
the home page at http://localhost:3000 and click the “about” link the page
is stuck in the loading state.
When we navigate via links created with the react-router NavLink
component the page is entirely client side rendered and we are not performing
any data fetching in the client yet! We are relying on the server to pass the
data. To fix things we need to add some client side data fetching to our About
component:
import React from "react";
import React, { useEffect } from "react";
import { usePageContext } from "../components/PageContext";
import fetch from "cross-fetch";

const About = () => {
  const { data } = usePageContext();
  const { data, setData } = usePageContext();

  useEffect(() => {
    // if we haven't hydrated with data from the server let's fetch it
    if (!data) {
      const initialise = async () => {
        const aboutData = await getAboutData();
        setData(aboutData);
      };
      initialise();
    }
  }, []);

  return (
    <>
      <h1>Hi From Random Cat</h1>
      {data ? <img src={`https://cataas.com${data.url}`} /> : "loading..."}
    </>
  );
};

export const getAboutData = async () => {
  const res = await fetch("https://cataas.com/cat?json=true");
  return res.json();
};

export default About;
Now refresh your browser on our home page http://localhost:3000 and click the
“about” link. If you see an image of a cat, you’ll know we made it!
Bonus SSR Gotchas
I’ll wrap up this article with a couple of gotchas that can be a common source of frustration to folks that are new to SSR particularly when migrating an existing application to leverage SSR.
The Absence Of Browser Globals On the Server

When server side rendering your application HTML, this is done in a
Node environment rather than a Browser environment. This means that browser
globals like window won’t be available on the server and any
attempt to access them in the server render of your React components will
result in an error!
Try it. Update the src/pages/Home.jsx with the code below:
import React from "react";

const WindowWidth = () => <div>{`Your window width is ${window.innerWidth}`}</div>

const Home = () => {
  console.log("Home Page Rendered");

  return <button onClick={() => alert("Hello world")}>Click Me</button>;
  return (
    <>
      <button onClick={() => alert("Hello world")}>Click Me</button>;
      <WindowWidth />
    </>
  );
};

export default Home;
Then refresh localhost:3000 when the server restarts. You should see an error
stack trace:

We need a way of opting out of SSR in these cases. To do that you have a couple of options:
- Lazy load the component in the client.
- Refactor your component so that it doesn’t access browser globals until after it has been mounted in a client side render.
Opting out of SSR via Lazy loading
Lazy loading (also referred to as code-splitting) is usually achieved via some form of dynamic import. Dynamic imports are asynchronous. They function as an escape hatch for opting out of SSR for those imports. Recall that on the server, rendering is a single-pass synchronous process. What this means in effect is that on the server, we will typically render a fallback for any dynamic import encountered and we won’t attempt to resolve it. The client will also render the fallback but will also initiate lazy loading of the associated import updating the client JS once it loads.
Until React ships support for lazy loading with SSR, loadable-components is the officially recommended solution. If you are using Next.js you can use the dynamic module to lazy load components in a way that also works in an SSR context.
Opting out of SSR with a Higher-Order Component
Dynamic imports are a sub-optimal solution for components that you know will need to be rendered for the initial page load and not as a result of some user interaction, which is the typical way to identify lazy-loading opportunities in your application. Dynamic imports introduce latency via network IO and also bring additional complexity due to the error handling needed to handle potential request failures.
An alternative to dynamic imports is possible due to a constraint imposed by
SSR we have already encountered: effects are not run on the server.
Invocations of useEffect are only ever invoked on the client. This allows us
to create a higher-order component (HOC) to easily opt-out of SSR anywhere we
need to!
Let’s fix our Home page. Create src/components/WithoutSSR.jsx and add the code
below:
import React, { useEffect, useState } from 'react';

export const WithoutSSR = ({ children }) =>  {
    const [isMountedInClient, setIsMountedInClient] = useState(false);

    useEffect(() => {
        setIsMountedInClient(true);
    }, []);

    return isMountedInClient ? children : null;
}
Now we can use our new HOC to opt-out of SSR for our component that is accessing
the window browser global:
import React from "react";
import { WithoutSSR } from "../components/WithoutSSR";

const WindowWidth = () => <div>{`Your window width is ${window.innerWidth}`}</div>

const Home = () => {
  console.log("Home Page Rendered");

  return (
    <>
      <button onClick={() => alert("Hello world")}>Click Me</button>;
      <WindowWidth />
      <WithoutSSR>
        <WindowWidth />
      </WithoutSSR>
    </>
  );
};

export default Home;
Now when you navigate to the Home page you should no longer see the error response!
Layout Effect Warnings on the Server
If you try to utilise useLayoutEffect on the server a warning will be
generated. This is due the semantics of useLayoutEffect. When specified, a
layout effect execution is required for the initial render.
In these cases you have a couple of options:
- Wrap the component that calls
useLayoutEffectinWithoutSSR. - Wrap
useLayoutEffectto calluseEffectinstead when in a Node environment.
An SSR-safe wrapper for useLayoutEffect (the second option) would look
something like this:
export const useBrowserLayoutEffect =
  typeof window !== 'undefined' &&
  window.document &&
  window.document.createElement
    ? React.useLayoutEffect
    : React.useEffect;
Then you would just replace calls to useLayoutEffect with
useBrowserLayoutEffect.
Closing Thoughts
Hopefully you found this post useful in gaining a better understanding of how SSR works and the advantages it can bring for the added complexity. You should now be in a position to go forth and leverage SSR to build better apps!
I’d encourage you to look to higher level abstractions and application Frameworks like Next.js that will do a lot of the heavy lifting covered in this post and to explore different rendering approaches (CSR/SSR/Pre-rendering) and even combinations of these approaches where it makes sense.
Also be sure to keep an eye out for:
- eventual SSR support with
SuspenseandReact.Lazywhich will make SSR alot easier to achieve outside of Next.js applications. - the next big thing in SSR with React: Server Components!
Until next time, Happy Hacking 🚀